Tuesday, June 14, 2016

Required accessories for installation-2016 Kia soul base model

Joying official website: carjoying.com

Purchased item: Joying newest Android 5.1.1 Lollipop car stereo


Required installation accessories

1. Face plate: Metra 95-7360B

2. Wiring Harness for Hyundai:  Metra 70-7304

3. If you want to keep your OEM USB function, you can purchase Metra AX-HYKIA-USB


You may have problems in installing, Here are some instruction for your reference
1. How to connect backup camerahttps://www.carjoying.com/Joying-blog/7.html  (Click Here)

2. How to connect ELM327 OBD2:  https://www.carjoying.com/Joying-blog/11.html  (Click Here)

3. Steering wheel control: https://www.carjoying.com/Joying-blog/15.html            (Click Here)

Instruction video for Android 5.1 model SWC: 
      

Any questions, please be free to contact us

https://www.youtube.com/c/BoykaJoying
http://forum.carjoying.com/
https://www.carjoying.com/
https://www.carjoying.de/
https://www.carjoying.co.uk/


Thursday, June 2, 2016

Stop in Boot Logo--RESOLVED

Question from Joying Customer:

My radio stopped working it froze and it wont do absolutely anything


E-mail 1:

Hello xx

This is Amy from Joying, we received your message for the product's issue. It mentioned "the radio stopped working it froze and wont do anything"

Could you send me some pictures or more detailed info about this issue?
Because we are not clear about the meaning of "stopped working and froze"
Does it mean froze in start logo or other?

Please don't worry, we will help you until the issue solved.
Hope to hear from you soon.
Best Regards,
Amy


E-mail 2:

Hello Amy yes the problem is that when I turn on the radio it just stay's there in the start up logo and wont go any further or do anything else.......


E-mail 3:

Hello xx

Glad to receive your reply.
It should have a problem in system, here are steps to solve it:
1. You need to get the update screen.
2. Choose recovery from backup
3. If this still can't solve it, please wipe all data/factory and cache reset, then re-download the system files, and update the system.

More detailed info:
1. You need to long press the power button after you put the key (if the head unit has been turn on, please turn off it first)
2. When you can see the button lights flash/change color, please loose your hand, then press power button again, you can get the screen for upgrade soon.  (You can watch this video: https://youtu.be/vHyVC2Nb5oc)


3. You can get update screen now, please choose "recovery from backup"
4. If this issue can't be solved through recovery, please wipe all data/ factory and cache reset, then re-download the system files and update it,
Please refer to this page https://www.carjoying.com/Joying-blog/12.html
Please download the version of Aug 22, 2015 or Sep 3, 2015 
5. You need to download joying android MCU and update files, then just copy Two file into SD card without any folder, insert it in GPS(map) Slot.
6. Choose update system/mcu image from sdcard and clear all.

If it's failed at the first time, please try more times again, and let me know the results.
Thanks&Regards,
Amy


E-mail 4:

Ok thanks let me try it

E-mail 5:

Great it worked thanks for everything

E-mail 6:

Hi xx

Thank you also for your support us, if the unit has anything wrong, please contact us again. Very pleased to serve you.

Best Regards,
Amy


Reference 1:


Reference 2:


More Focus on Joying:


Tuesday, May 31, 2016

Sharing: 1.5 Din to Double Din Head Unit Conversion

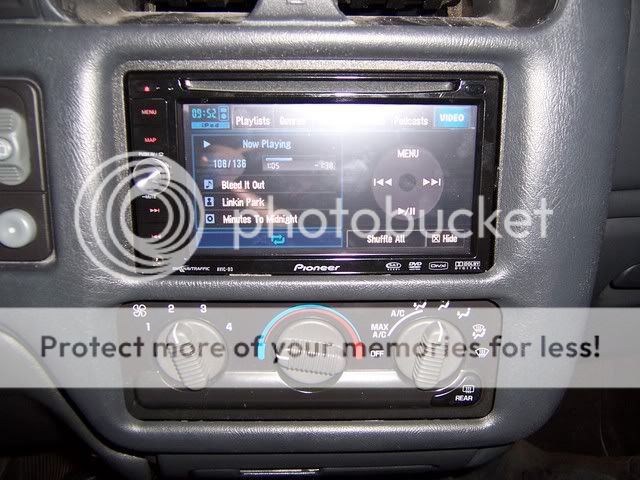
1. 1998-2003 Chevrolet S-10 Car Stereo Removal: 


2. A Joying customer share a post to us, below is the copy, if you want to read the original article, please click here .


How-To: 2nd Gen 1.5 Din to Double Din Head Unit Conversion

This applies to 98-02 S-Series with the factory 1.5 Din head unit. I'd seen a few pics of this done but never really a thorough step-by-step description of the process, so I thought I'd throw this together for anyone interested. This actually isn't that difficult at all, there's minimal cutting involved, you just gotta have a little patience.


Materials Needed
- '03 and up Dash Bezel
- Metra '99-'03 GM Multi-kit (Any GM double din mounting kit should work though) Side Note: I'm told Schosche makes an S-Series double din kit that should bolt right up, maybe someone can confirm this?
- 5 minute epoxy glue
- A dremel, or your cutting tool of choice

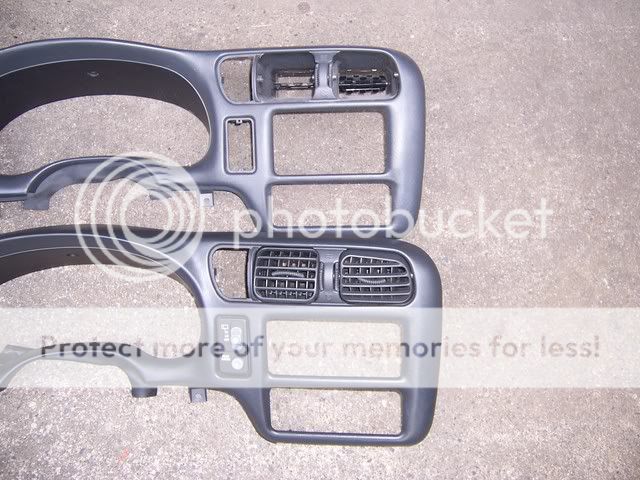
First of all, a comparison shot of the two different bezels, the top one is the guy you're looking for. Snap one up if you see it cause they can be tough to find!

               
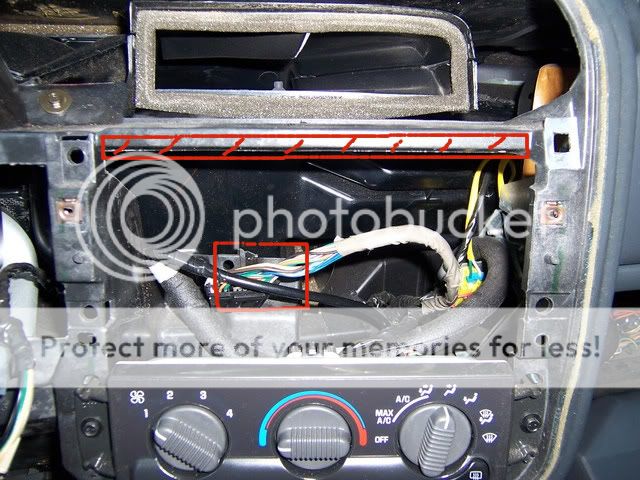
Now, once you've got everything out, you're going to need to do a little trimming. On top, you'll need to take about a quarter inch out of the plastic support piece, and then while I didn't get a great shot of it, you'll need to trim off the piece that supports the factory head unit. This will give you enough clearance to fit your double din unit.


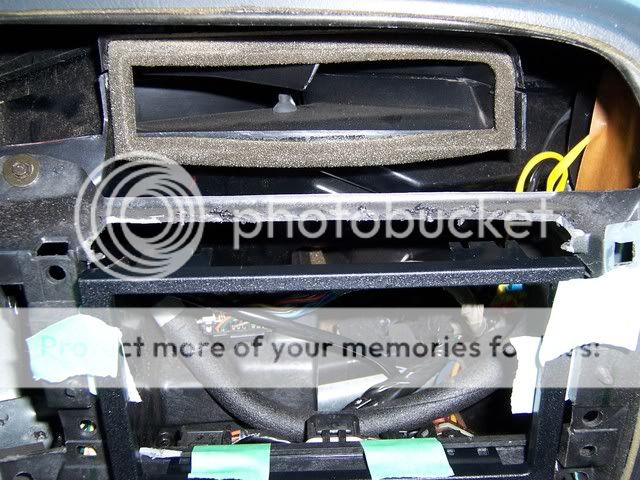
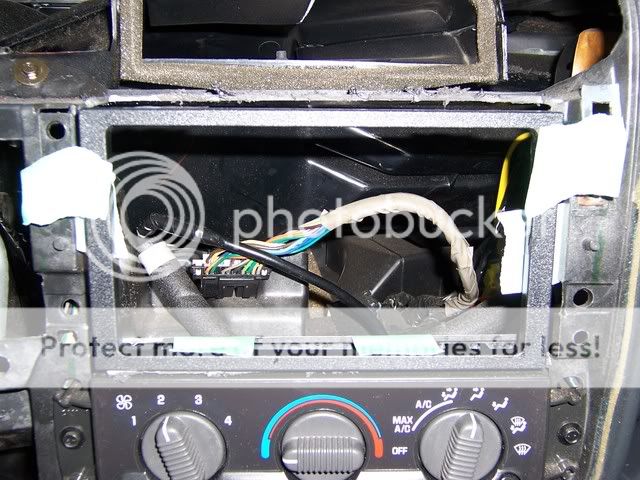
As it turns out, I took off waaay more than I needed to up top, but you get the idea. Now you're gonna have to fab up your own mounting brackets, so grab some masking tape, then take some time popping the new bezel on and off to figure out exactly where you want everything to sit. It'll make it easier to get some measurements that way too.


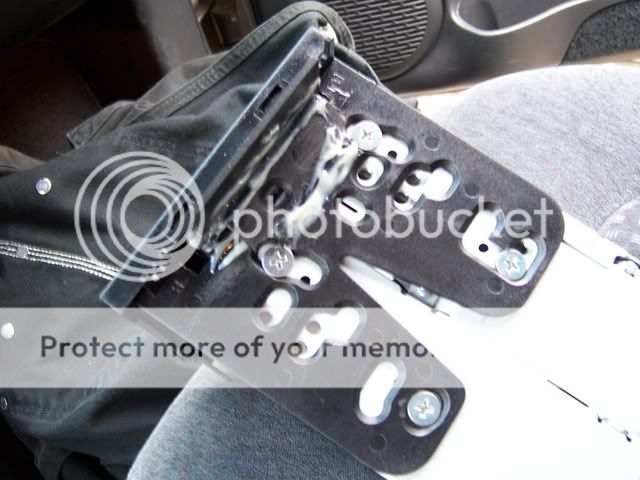
Now, you're gonna need to modify you're mounting kit a bit, you'll see what needs to be trimmed off when you test fit it. Then you'll need to fab up some ears where the kit will mount to the dash. I just cut up some extra pieces that came with the kit, but I'd reccommend using something a little bigger, as the pieces I used left you VERY little room to work with as you can see. This is also where your epoxy glue (or any high strength adhesive) comes in to play. This part will be holding a fair bit of weight, so don't be afraid to go nuts with it.


And there she is! I wasn't totally loving how little the left side screw was holding, so I popped in a self tapping screw just for extra support. I'll probably go back and re-do that part later.


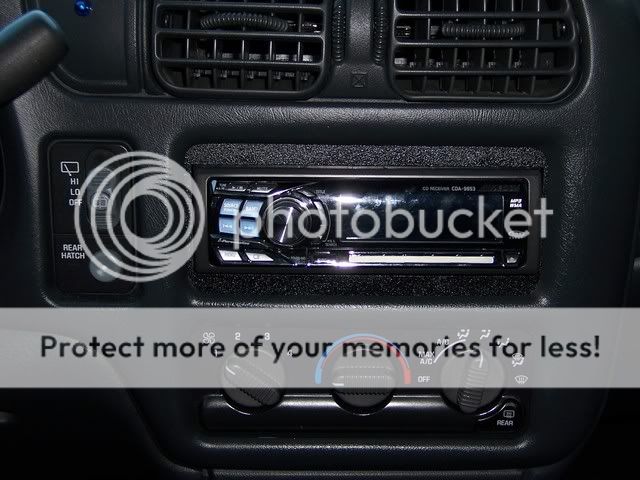
Before:


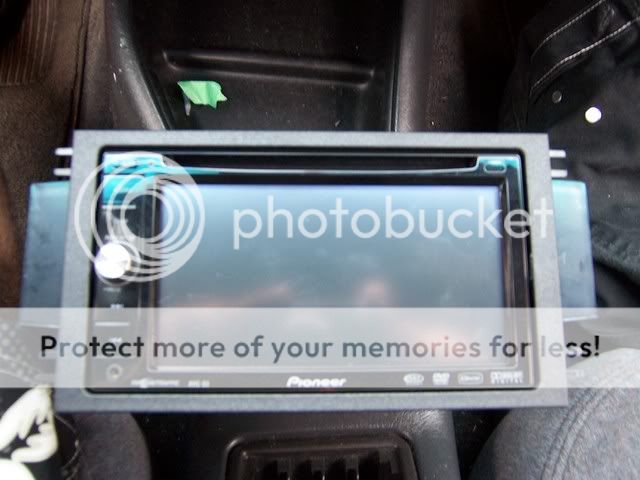
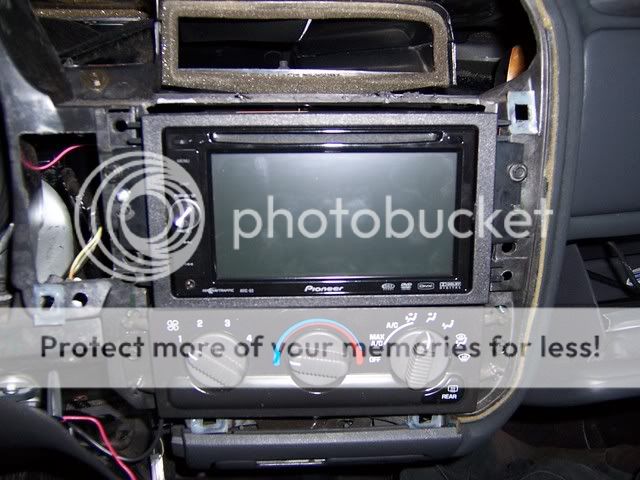
And After! It looks a little crooked because I didn't have the bezel totally buttoned up yet, but you get the idea.


Thursday, May 26, 2016

Replace a KW-NT500HDT in a Motorhome

Recently, we have a customer purchased a universal double din head unit from us. (JOYING)
The universal head unit comes with ISO harness, we should need some installation accessories.
I'm worried this buyer can't find the proper accessories, so I e-mailed him.
Then I got the reply soon. Below is the copy of that e-mail.


Hello Amy,
The unit is to replace a KW-NT500HDT in a motorhome.

I need to find a sleeve compatible with this (if dropbox prompts for login, please cancel the prompt, you don't need to log into dropbox):
https://www.dropbox.com/s/2dzakkzvix9ywa0/JvcSleeve.jpg


Also note in the above photo, the plug that was used is different to the universal plug - I need to swap out one or the other, but I don't mind which.

I would like to use the existing GPS Arial that has been wired to the top of the motorhome. However it's connector is as follows:
https://www.dropbox.com/s/tjm2gvginv7twi9/GpsConnector.jpg


I don't know if there is an adapter plug for this.

JVC KW-NT500HDT instructions below for reference.
http://resources.jvc.com/Resources/00/01/52/LVT2277-002A.pdf

Thank you in advance for a prompt reply!
-


This is my reply:
Hello xx

Glad to receive your message.
I don't prompts for login and check the pictures directly.

1. There should have a original mounting bracket, you just need to remove it, and fix it on Joying main engine with screws.
Then install the main engine to here: https://www.dropbox.com/s/2dzakkzvix9ywa0/JvcSleeve.jpg

2. I can see the plug, but we don't have the proper harness for this. May I know the year and model of your car. We can help you find it online;
such as these site: 
http://www.connects2.co.uk/products
https://www.dynamicsounds.co.uk/

3. If you want to use the previous GPS Arial, you need a adapter. Could you find it?
Here is an Antenna adapter for VW, https://avinusa.com/factory-gps-antenna-adapter.html
Because I don't know the model of your car, I can't help you find the adapter for you, sorry.
This head unit comes with a GPS Arial, you can use it. You can use this GPS Arial if you can't find the adapter.

4. Here is blog about our ISO harness, https://www.carjoying.com/Joying-blog/33.html
You can read it if you need.

If you have questions, please e-mail me again.
Best Regards,
Amy

Wednesday, May 18, 2016

Installation Experience about 2012 Jeep Wrangler Joying Double Din Head Unit

This is the e-mail from JOYING Customer:

Certainly I'll be glad to help you document what is needed for the installation on a 2012 Jeep Wrangler. 

The wiring harness with can-bus adapter is RP4-CH11 from PAC
To make steering wheel controls work, you need to buy a 3.5 mm female jack
From radio harness, KEY1 wire goes to one lead and KEY2 goes to other lead. Then plug 3.5 mm male plug from can-bus into this new female jack.


Also required is an antenna adapter.  
                      
The dash adapter required is Metra 95-6511
                       
This friend installed Joying 7 inch universal double din head unit JY-UL135 in his Jeep, Dimension: Panel size is 178*100mm; main engineer size is 178*143*100mm. Please measure your open space first, you may need to modify the dashboard. 
If you have questions, please be free to contact us.


Focus more on our site:
http://forum.carjoying.com/
https://www.youtube.com/c/BoykaJoying
https://www.carjoying.com/
https://www.carjoying.de/
https://www.carjoying.co.uk/

Monday, May 16, 2016

Joying JBL harness can't fit your Toyota Camry?

I received feedback from Joying customers, they said our JBL harness can't match his car. 
There are lots plugs on his factory car, but he can't find where he can connect to Joying harness. 


Below are some pictures from our customer:


Correct Connection:


We just need to connect three connectors
Plug 1/plug 2, steering wheel control, factory radio antenna

The connection is very easy, if you have question, please be free to ask me.